I have released four recipe books so far:

The Best of the Sunny Raw Kitchen
The Best of Raw Freedom Community
Delightfully Raw and
Deliciously Raw

These feature some of the most delectable creations to have come out of my raw kitchen and will appeal to anyone interested in a healthier diet, regardless of their level of knowledge and experience. From easy one-step everyday fare to more elaborate and involved gourmet dishes and layered cakes, they offer something for everyone and every occasion. Incredibly tasty smoothies, creamy and comforting warm soups, sexy salads, delicious nut cheezes, satisfying entrees and scrumptious guilt-free desserts...

Healthy food never tasted so good!

To learn more about my recipe books, click here!

Monday, September 22, 2008

Recipe of the Week: Garlic & Dill Cheeze


A few months ago, I was telling you all about my first experiment with fermented nut cheeze. It's one of those things that may look intimidating, but is definitely worth the time and effort. The result is simply unbelievable; so similar to the 'real thing' in looks, texture and even flavor.

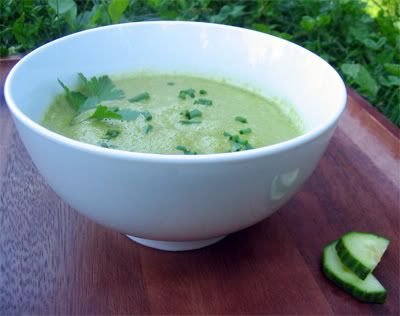
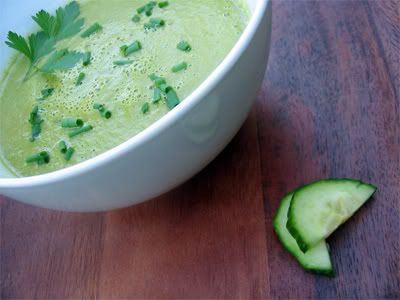
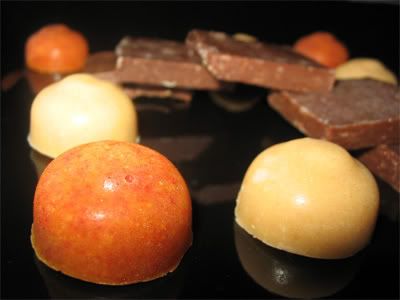
As Heathy had yet to try her hand at nut cheese-making, she asked me to put it on 'The List'. Plus, cheeze and crackers were the perfect complement to our daily soups and salads; leaving plenty of room for the decadent desserts that have been rolling out of our sunny kitchen. ;-) (Not to worry, I promise to give you a detailed photo summary once we've landed in our new home.)

Anyhoo, I decided to make the delicious Herb Cheeze that was featured in my 'Not Cheeze Pleaze' post. After reading the tantalizing combinations that someone posted on Raw Freedom Community, I also came up with a Garlic & Dill variation that turned out really well. We served the last of it to our friends, John and Livina, who joined us for dinner yesterday and they were very impressed.

Garlic & Dill Cheeze

1 cup Cashew Cheeze (See recipe below)
1 generous teaspoon minced garlic
1 teaspoon minced chives
1 teaspoon nutritional yeast flakes
1/4 teaspoon lemon juice
1/4 teaspoon sea salt
1 teaspoon onion powder
1 tablespoon minced fresh dill
---
Finely ground almonds, dried dill and garlic powder for the crust


Combine Cashew Cheeze, chives, garlic, nutritional yeast, lemon juice and salt in a bowl. Stir until well mixed. Add fresh herbs and stir until well distributed. Taste and adjust salt, if desired.

Shape the Cheeze mixture into a round or press firmly into a small container or bowl lined with plastic film. Sprinkle mixture of ground almonds, dried dill and garlic powder on top. Allow to chill for at least 12 hours or until it firms up.

When firm, de-mold, turn over and transfer onto a plate. Sprinkle more dried herbs on top and sides.

Store in fridge in airtight container for up to 3 or 4 days.


Basic Cashew Cheeze

3 cups cashews, soaked 12-14 hours
3 capsules probiotics
2/3 cup fresh rejuvelac (see instructions in this post)

In high speed blender, blend the soaked cashews with probiotics and rejuvelac until smooth.

Line a sieve with a double thickness of cheesecloth and place over a bowl. Transfer the mixture to the sieve, drape the cheesecloth over the top, cover with a towel and leave in a warm place to ripen for 14-16 hours.

Season according to one of the following recipes (or come up with your own variation!)

Alternatively, shape the mixture into a round, place in a covered container, and refrigerate for at least 24 hours, or until it firms up.

Store in fridge in airtight container for up to 3 or 4 days.

Carmella's Notes:
~ I forgot to soak the cashews ahead of time so I did a little experiment; I ground them up finely in the Vitamix first and added a little more water. The mixture didn't blend as easily as with soaked cashews so I ended up using more liquid than in the original recipe. The texture of the resulting Cheeze was a touch softer and had more the consistency of Boursin. Out of this world!

~ Our place was a bit cool so I let the Cheeze ferment for about 24 hours.

Serve with your favorite crackers!
Amazing stuff!

Sunday, September 14, 2008

Recipe of the Week: Cream of Cucumber Soup

As I was telling you in my last post, Don and I picked up a very special guest at the local airport on Monday: The Raw Goddess in the flesh! If you remember, Heathy came for a visit last November and we had an uncooking marathon of gigantic proportions. We had such a blast that she is now back for more food 'n fun!


Knowing how much Heathy and I love playing together in the kitchen - especially making decadent desserts - we came up with The Perfect Plan. Why bother spending time, energy and precious stomach space on fancy entrees when we can go straight to the good stuff? lol So our daily fare consists of juice, smoothie, soup, salad and, of course, a big serving of dessert.

Speaking of sweet treats, we've been doing some last minute recipe testing for Heathy's much awaited Just Desserts ebook. We've also been making good progress editing the written material together. (I'm her official editor in chief! ;-) ) I won't get a chance to finalize the formatting while she's here, but we're now talking weeks before the ebook is available. Woo Hoo! (If you haven't seen Raw Goddess Heathy's dessert creations yet, pop over to her site and you'll see what the excitement is about!) I guarantee you that it will be worth every second of that loooooooooong wait! The ebook isn't even finished and it's already clear that it will become my Raw Dessert Bible. lol

In the meantime, here's one of the lovely soups I served Her Highness. It's a simple recipe with just a handful of basic ingredients. But don't be fooled; the whole is much greater than the sum of its parts!


Cream of Cucumber Soup
By Jennifer Cornbleet
Posted by Velvet on Raw Freedom Community

4 romaine lettuce leaves, chopped (about 1.5 cups) (I use tightly packed cups)
1 cucumber, peeled, seeded, and chopped (about 1 cup)
1/2 cup water
1 T lemon juice
1/2 t crushed garlic (1 clove)
1/4 t salt
1/2 ripe avocado, chopped
1 T extra virgin olive oil
1 T minced fresh herbs, or 1 t dried (I use parsley)

Place the lettuce, cucumber, water, lemon juice, garlic, and salt in a blender and process until smooth. Add the avocado and EVOO and blend again until smooth. Add the herbs and blend briefly to mix. Serve immediately. For a chilled soup, refrigerate for 2 hours before servings.

Velvet's Notes: I love it, it makes 2 servings, but I drink the whole soup because it's so good. It says to blend in steps, but I add everything to the vita-mix and blend once until smooth.

Carmella's Note: The first time I made this, I used half the amount of lemon juice and it was still too lemoney, so I'd recommend going by taste.


Monday, September 8, 2008

Recipe of the Week: Raw Yummilicious Milk Chocolate


As I'm expecting Heathy's arrival tomorrow (woo hooooooooo!!!), I wanted to prepare a special treat for the one I've nicknamed 'The Ultimate Raw Dessert Queen'. Plus, it was the perfect excuse to try the new chocolate candy molds I bought during my recent visit to the city. I got to work and made a batch of Orange Goji Berry White Chocolate and a variation of Mishka's Raw Yummilicious Milk Chocolate recipe sans the cacao powder. As an afterthought, not sure whether there'd be quite enough, I decided to whip up some more of the Milk chocolate, just to be safe. Only it turned somewhat into a chocotastrophy (to borrow shannonmarie's term.)

When measuring the melted cacao butter, I realized it didn't yield the necessary amount. (I find it's always a hit-and-miss kinda thing.) "Ah well... No big deal," I thought, so I went ahead and blended the ingredients anyways. The consistency, though, was too thick and grainy. I was in a bit of a bind; I knew that by the time I heat up more cacao butter in the dehydrator, the mixture would almost certainly have seized up in the carafe (nasty business!) Hmmm, what to do...

Since I had some melted coconut oil all ready for a different recipe, after a moment's hesitation, I decided to go for it. I mean, it was right there, sitting on the counter... It seemed so much simpler, right? Wrong! One definition of insanity is doing the same thing while expecting different results, so go ahead... you can call me the 'Cacao Coo coo'! lol See, I've tried mixing coconut and cacao butter before while making chocolate candy a few months back, and let's just say it wasn't a successful experiment. Although the flavor was lovely, the mixture had more of a fudge consistency than hard chocolate. This time around, I managed to make matters worse by pouring the dodgy-looking mixture (to top it off, the oils had separated as well! Yuck!) into my little candy moulds. Not a good idea!!! I ended up having to painfully extract the soft fudge with a knife, remelt it and form it into a flat slab.

Ah well... Always something new (or not so new? lol) to learn, eh?

BUT, boy oh boy, does this chocolate ever taste divine!!!

Moral of the story, DO NOT EVER attempt to mix cacao and coconut butter together in a chocolate candy recipe, regardless of how good an idea it may seem at the time. lol

And above all, DO try Mishka's Milk Chocolate; it truly is out of this world!


Raw Yummilicious Milk Chocolate
By Mishka
Posted on Raw Freedom Community

2/3 cup cashews
2/3 cup agave nectar (maybe just a bit less than this)
2/3 cup cacao butter (liquified)
1 Tbsp lucuma
1 Tbsp mesquite
1 tsp vanilla
4 Tbsp cacao powder

Liquify cacao butter in sun or dehydrator. In Vitamix, blend all of the above, and pour into moulds or onto wax paper in dish. Freeze, cut, and enjoy!

Mishka's Note: I made the mistake of putting the cashews and dry stuff in the blender first today...big whoops. Definitely, put all wet ingredients in first, then add the previously blended cashews. And it all goes good from there!

Carmella's Notes:
~ I would recommend grinding the cashews first for easier processing.

~ I cut down on the sweetener a bit... used more like 1/3 cup agave as I prefer it not too sweet.


I think Her Highness should be pleased... ;-)

Monday, September 1, 2008

Recipe of the Week: Tomato Dressing

At long last, tomato season is finally here! Yay! We loaded up with 20 lbs of organic canning tomatoes at the local fruit stand during the week and it's been tomato-mania ever since...

After my first experience of dehydrating toms last year, I was all gung-ho to give it another try and fill up the D. As the tomatoes were gigantic, I decided to slice them in 1/4 " slices and it worked out really well. I also made Salsa Wraps which are always so great to have handy. (If you've tried these fajitas before, then you know what I mean!) And of course, we've been enjoying lots of toms in salads and soups (see this recipe... oh and this one too!) Not to mention that it was the perfect opportunity to make what has become one of my favorite dressings. It's my good friend Ingrid's creation who actually somehow picked up on the vibes as she sent me a chat while I was working on this post. ;-)


Tomato Dressing
Posted by Ingrid on Natural Living Cuisine

PREP: 5 Minutes TOTAL: 5 Minutes

Try this fresh slightly spicy tomato dressing on your next salad or as a dip with fresh vegetables. The garlic and pepper give it its spicy flavor.

2 medium tomatoes, chopped
¼ cup cold pressed extra virgin olive oil
2 tablespoons apple cider vinegar
2 cloves garlic
1 teaspoon celtic salt
1 teaspoon fresh cracked mixed pepper
1 teaspoon Hungarian paprika

Put all ingredients into the blender, except olive oil, and blend until mixed. While blender is still running slowly pour in olive oil, blend until mixture is creamy. Store in salad dressing bottle and refrigerate. Keeps about 5 days. Shake well before serving.

Makes about 1 1/2 cups

~ ~ ~ ~ ~ ~ ~ ~ ~ ~ ~ ~ ~ ~ ~ ~ ~ ~ ~ ~ ~ ~ ~ ~ ~ ~ ~ ~ ~ ~ ~ ~ ~
TIP
Substitute paprika with the fiery flavor cayenne or combine both for a spicier dressing.

Carmella's Note: I usually use about half the amount of pepper and it has plenty of a bite for me. (But then again, I'm not such a fan of really spicy food. ;-) )